
Vehicle Maintenance Guides
These vehicle maintenance guides will provide you with the knowledge you need to keep your car in the best condition. Taking care of your car by performing regular and routine maintenance helps ensure that your vehicle is safe and reliable.
Essential Car Care Tips
With proper care and regular maintenance, you can extend the life of your vehicle. You can also save money on costly repairs and reduce upkeep expenses. To keep your car running its best, following the recommended maintenance schedule is necessary. You should also wash and wax the car often to prevent contaminants from destroying the paint. By fixing things at the first sign of failure, you further protect the car from unnecessary damage.
Wash Your Vehicle Regularly And Replace Windshield Wipers
It may not seem like cleaning the car is going to keep it in good shape, but it’s imperative to the life of the vehicle. By cleaning off road salt, debris and contaminants, you prevent rust and corrosion from occurring.
To keep your visibility its best, we recommend changing the wipers every year unless extreme situations call for replacement more frequently. The windshield wipers should always glide seamlessly across the auto glass. There should be no residue or streaks left behind. Any imperfection can lead to reduced visibility.
Check And Maintain Fluid Levels
Every fluid that’s used in your vehicle has an important purpose, but to work properly, it must be filled. For that reason, you want to check all of the fluids periodically, even the windshield washer fluid. If any of them are low, top off the system. If the fluid continues to look low, there could be a leak that needs to be repaired.
Check And Maintain Tires
The tires are the only part of your vehicle that touch the road. For that reason, it’s imperative that there’s an appropriate amount of pressure inside them, ensuring you have a safe ride. You can find the recommended psi on the label inside the driver’s side door. It’s recommended to check the tire pressures once a month and topping off the air if necessary. You should also check them when the temperatures change significantly. If you find a leak in any of the tires, you should have it repaired or replaced immediately.
While you fill up the tires, perform a quick inspection of the tread. If there are signs of uneven tire wear, you may be able to get away with a rotation, but you should figure out what’s causing the problem and fix that as well. If there’s any damage to the sidewall or chunks out of the tread, you have bigger problems. Have the tire replaced immediately before you have a blowout on the highway.
By rotating the tires every 5,000 to 7,500 miles, you help the tread wear evenly. You need to pay close attention to tire rotation patterns, as each car requires something different. In some cases, it’s okay to rotate the tires from front to rear or side to side. Other cars require the forward cross, X-pattern or rearward cross rotation instead. You can usually find this information in your owner’s manual.
Check Your Lights And Battery
While checking the lights on your car isn’t going to keep it running better, it can prevent an accident. You have a lot of exterior lights that must be working correctly to protect you. Be sure to look at the headlights, turn signals, brake lights, backup lights and parking lights.
For your vehicle to start, you need a functioning battery to provide plenty of voltage. If any of the connections become corrupted, the voltage won’t be able to flow freely, and you may get stranded. Take time to visually inspect your car battery occasionally for any signs of wear. Bulges or swelling of the case are signs of this. If you see these, the battery should be replaced. If you see corrosion on the terminals, you can clean it off with a baking soda and water mixture to re-establish the connection.
Inspect Belts, Hoses, Brake Pads And Rotors
While you aren’t required to change the belts and hoses on a regular basis, you do want to check them often. If there’s one with a malfunction, tear or crack, you want to know it sooner than later. Whether you are dealing with a vacuum hose or the serpentine belt, a quick inspection can head off a lot of trouble. You may want to include these checks in your yearly maintenance.
While it’s important to change the brake pads regularly, it might be even more valuable to check them often. Dirt and debris can get trapped in the brakes, leading to mechanical problems. If you are on top of the brake condition, you can prevent costly repair bills. You’ll also know when the pads and rotors need to be changed.
Most car maintenance tips aren’t difficult to follow through with. Even if you aren’t a professional technician, as we are, you can still do many of these in your home driveway.
DIY Car Maintenance For Beginners
As a car owner, regular maintenance is essential for ensuring your vehicle runs smoothly and remains reliable. DIY Car Maintenance can save you time and money. While it’s tempting to take your car to a mechanic for every little issue, many basic maintenance tasks are easy enough to do yourself, even if you’re a beginner.
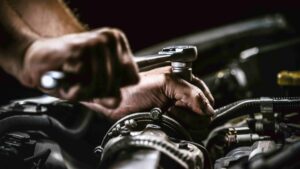
Oil Changes
One of the most important aspects of car care is changing the engine oil. The oil helps keep the engine lubricated and prevents wear to your car’s components, which is Why Oil Changes Are Important.
- Gather Materials And Tools. Make sure you have all the necessary materials and tools listed above before you start. These Include a new oil filter, engine oil, drain pan, filter wrench, jack and jack stand/ramps, funnel and a wrench set.
- Prepare Your Vehicle. Park your car on a level surface and engage the parking brake. If you’re using ramps, drive your car onto them. If you’re using a jack and jack stands, lift the front of the car and secure it on the stands.
- Locate The Drain Plug and Oil Filter. Refer to your vehicle’s owner’s manual to locate the oil drain plug and oil filter. Usually, the drain plug is on the bottom of the engine, and the oil filter is on the side.
- Remove The Filler Cap. Doing so helps the oil drain easier.
-
Remove The Drain Plug.
Position the oil drain pan under the oil drain plug. Use a wrench to loosen and remove the drain plug. Allow the oil to drain completely.
- Remove The Oil Filter. Using an oil filter wrench, loosen and remove the oil filter. Be prepared for some additional oil to drain when you remove the filter. You can use an oil filter drain tool to minimize the mess.
- Install The New Oil Filter. Before installing the new oil filter, apply a small amount of oil to the rubber gasket on the top of the filter. Screw on the new filter hand tight.
- Replace The Drain Plug. Once the oil has completely drained, replace the oil drain plug and tighten it with a wrench.
- Add New Oil. Using a funnel, pour the recommended amount and type of oil into the engine. Check your owner’s manual for this information.
- Check Oil Level. Start the engine and let it run for a minute or two. Turn off the engine and wait a few minutes for the oil to settle. Check the oil level using the dipstick. Add more oil if necessary.
- Dispose Of Old Oil And Filter. Take the used oil and filter to a recycling center. Many auto parts stores accept used oil for recycling.
Fluid Checks
Performing a fluid check is an essential part of regular vehicle maintenance. Here’s a simple step-by-step guide for checking various fluids in your car.
Engine Oil
- Park on a level surface. Ensure your car is on a flat surface and the engine has been turned off for a few minutes to allow the oil to settle.
- Locate the dipstick. Open the car’s hood and find the engine oil dipstick. It usually has a brightly colored handle, often yellow or orange.
- Pull out the dipstick. Remove the dipstick, wipe it clean with a cloth or paper towel, and reinsert it all the way in.
- Check the oil level. Pull out the dipstick again and observe where the oil level is. There are markings on the dipstick indicating the proper oil level. If it’s below the minimum mark, you need to add oil.
- Check the oil color. Observe the color of the oil. Healthy oil is typically amber or brown. If it’s black, gritty, or has a burnt smell, it may be time for an oil change.
Transmission Fluid
- Start the engine. Some cars require the engine to be running for an accurate transmission fluid check. Refer to your owner’s manual.
- Locate the transmission dipstick. Similar to the engine oil dipstick, find the transmission dipstick, which is often located near the back of the engine.
- Check the fluid level. Pull out the transmission dipstick, wipe it clean, reinsert it, and then check the fluid level. The markings on the dipstick will indicate if it’s within the proper range.
Brake Fluid
- Locate the brake fluid reservoir. Open the car’s hood and find the brake fluid reservoir. It is usually a small, transparent reservoir located near the brake master cylinder.
- Check the fluid level. The reservoir will have markings indicating the proper level. Ensure the brake fluid level is between the minimum and maximum marks.
Coolant/Antifreeze
- Check when the engine is cool. Make sure the engine is cool before opening the radiator or coolant reservoir cap to avoid burns.
- Locate the coolant reservoir or radiator cap. The coolant reservoir is often a translucent plastic container. The radiator cap is on top of the radiator.
- Check the fluid level. If your car has a coolant reservoir, observe the level through the markings. If you’re checking the radiator directly, ensure the coolant is near the top.
Tire Rotations
Regular tire rotations help maintain even tire wear, improve vehicle handling, and extend the life of your tires. Always follow safety precautions and refer to your vehicle’s manual for any specific instructions or recommendations.
- Prepare Your Vehicle. You’ll want to start by parking on a flat, level surface and engaging the parking brake.
- Gather Materials. Ensure you have all the necessary tools and materials. These include a car jack, jack stands, lug wrench, wheel chocks, torque wrench and a tire pressure gauge.
- Loosen Lug Nuts. Using the lug wrench, slightly loosen the lug nuts on all four wheels. Do not remove them completely at this stage.
- Place Wheel Chocks. Place Wheel Chocks behind or in front of the wheels that will remain on the ground. This adds an extra layer of safety.
- Lift The Vehicle. Use the car jack to lift one end of the vehicle at a time. Refer to your vehicle’s manual for the correct lifting points.
- Secure With Jack Stands. Once the vehicle is lifted, place jack stands under the car to provide additional support. Make sure the vehicle is stable before continuing.
-
Remove Wheels And Inspect Tires.
Finish loosening the lug nuts and remove the wheels from the lifted end of the car. Take this opportunity to inspect the removed tires for uneven wear, damage, or other issues.
- Rotate Tires. Follow the recommended tire rotation pattern for your specific vehicle. Common patterns include front-to-back, crisscross, or a specific rotation recommended by your vehicle’s manufacturer.
- Install Wheels. Place the rotated tires onto the appropriate positions and hand-tighten the lug nuts.
- Lower The Vehicle And Tighten Lug Nuts. Use the jack to lower the vehicle carefully from the jack stands. Once the vehicle is on the ground, use the lug wrench to tighten the lug nuts in a star pattern. Refer to your vehicle’s torque specifications and use a torque wrench to ensure proper tightening.
- Check Tire Pressure. Finally, check and adjust the tire pressure for all four tires according to the specifications in your vehicle’s manual. This is an important step to the process, as overinflated and underinflated tires are the Most Common Cause Of Tire Blowouts.
Air Filter Replacement
Replacing a vehicle’s air filter is a relatively simple task that you can do yourself. Keep in mind that specific steps may vary depending on your vehicle make and model, so it’s a good idea to consult your vehicle’s manual for any model-specific instructions.
- Gather Supplies. Ensure you have all of the necessary supplies and materials. These include a new air filter, screwdriver or wrench, owner’s manual and a vacuum cleaner or compressed air.
- Locate And Open The Air Filter Housing. Refer to your owner’s manual to find the air filter housing in your vehicle. It’s usually located in a black plastic box near the engine. Most air filter housings have metal clips or screws securing them. Use a screwdriver or wrench to loosen the fasteners or release the clips. Some vehicles may have a simple latch system.
- Remove And Inspect The Old Air Filter. Take out the old air filter from the housing. Note its orientation, as the new filter needs to be installed the same way. Check the old air filter for dirt and debris. If it’s very dirty or clogged, it’s a sign that it needed replacing.
- Clean The Air Filter Housing. If there’s debris or dirt inside the air filter housing, use a vacuum cleaner or compressed air to clean it.
- Install The New Air Filter And Close The Housing. Place the new air filter into the housing with the same orientation as the old one. Secure the housing using the clips, screws, or latches.
- Dispose Of The Old Air Filter. If the old air filter is disposable, properly dispose of it according to local regulations. If it’s a reusable type, follow the cleaning instructions in your owner’s manual.
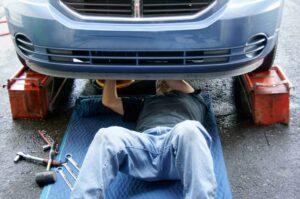
Brake Pad Replacement
Replacing brake pads is a common DIY task for car maintenance. Please note that this is a general guide, and you should always consult your vehicle’s manual for specific instructions.
- Gather Materials. Make sure you have all the necessary tools and materials. These include new brake pads, jack and jack stands, lug wrench, brake caliper tool, wrench set and socket set. Ensure your car is parked on a level surface.
- Loosen Lug Nuts. Loosen the lug nuts on the wheel of the brake you’re replacing. Do this before lifting the car to make it easier.
- Lift Car And Remove The Wheel. Use a jack to lift the car off the ground. Once lifted, secure it with jack stands for safety. Completely remove the lug nuts and take off the wheel to access the brakes.
- Locate The Caliper. Find the brake caliper, which is usually held in place by two bolts. These bolts may be on the back or front of the caliper.
- Remove The Caliper. Use a wrench or socket set to remove the caliper bolts. Once removed, hang the caliper from the suspension using a wire or zip tie to avoid putting stress on the brake line.
- Remove Old Brake Pads. Slide out the old brake pads. Take note of how they are positioned, as you’ll need to install the new ones the same way.
-
Compress The Caliper Piston.
Use a C-clamp or brake caliper tool to gently compress the caliper piston back into the caliper housing. This makes room for the new, thicker brake pads.
- Install New Brake Pads. Insert the new brake pads into the caliper bracket, making sure they are positioned correctly.
- Reattach The Caliper. Place the caliper back over the brake pads and secure it by tightening the caliper bolts.
- Put The Wheel Back On And Lower The Car. Reattach the wheel and hand-tighten the lug nuts. Carefully lower the car with the jack until it is resting on the ground.
- Tighten Lug Nuts. Use a lug wrench to tighten the lug nuts in a crisscross pattern. This ensures even pressure on the wheel.
- Test The Brakes. Before driving, pump the brake pedal a few times to bring the brake pads into contact with the brake rotor. Test your brakes in a safe and controlled environment.
If your brake pads need replacement in a very short amount of time after getting them, you may want to check if your Brake Pads Are Covered Under Warranty.
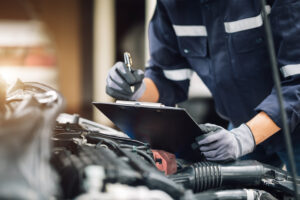
Seasonal Vehicle Maintenance Checklist
As the seasons change, so do the maintenance needs of your car. While you may deep clean your car in the spring to get rid of all those soils and rock salts, the summer calls for a fresh layer of wax or coating to protect your paintwork from the sun’s harmful UV rays. It’s important to know which areas of your car to clean, restore and protect each season to prevent staining, oxidation and permanent damage to your vehicle, both inside and out.
Spring/Summer Checklist
Preparing your vehicle for summer is important to ensure smooth and safe travels in warmer weather. Here’s a checklist to help you get started:
- Check engine oil, coolant levels, brake fluid, power steering fluid and windshield washer fluid.
- Test your air conditioning system and recharge refrigerant if needed. You also will want to clean or replace the air cabin filters.
- Check tire pressure, including the spare. You’ll also want to inspect the tires for uneven wear or damage and rotate the tires if needed.
- Replace warm wipers and ensure the washer system is functioning correctly.
- Inspect the exhaust system for leaks, damage or rust.
- Clean the interior to remove any winter debris and check the condition of floor mats.
- Consider applying a sunshade to protect the interior from UV rays.
- Ensure your vehicle has a well-stocked emergency kit with items such as a first aid kit, jumper cables, flashlight, basic tools and water.
- If you’re planning a long road trip, be sure to plan your route, check the weather and have all the necessary supplies.
Regular maintenance and checks contribute to the overall safety and performance of your vehicle, especially as seasons change. If you’re not comfortable performing these checks yourself, consider taking your vehicle to a professional mechanic.
Fall/Winter Checklist
it’s crucial to ensure your vehicle is prepared to handle the challenges that colder temperatures and inclement weather can bring. Here’s a comprehensive winter vehicle checklist for you:
- Check tire tread depth and ensure tires are properly inflates. You could also consider winter tires for better traction.
- Test the battery to ensure its working properly, then clean battery terminals and cables.
- Check coolant, windshield washer fluid and oil levels and consider using winter grade fluids.
- Inspect brakes for wear and tear and ensure the brake fluid is at the recommended level.
- Ensure Headlights, brake lights and turn signals are working properly.
- Test the heater and defroster to ensure they are working effectively.
- Replace wiper blades if they’re worn and ensure the windshield washer system is functioning.
- Keep the fuel tank at least half full to prevent the fuel line from freezing.
- Lubricate locks with de-icing fluid and ensure door seals are intact to prevent drafts.
- Carry sand, salt or cat litter to provide traction on icy roads.
- Keep a charger in your vehicle in case you need it during an emergency.
- Pack a winter emergency kit, including a blanket, extra clothing, a flashlight, water, non-perishable snacks and a first aid kit.
Remember, it’s crucial to stay informed about weather conditions and road closures during the winter season. Regular maintenance and preparation can help ensure a safer driving experience in challenging conditions.


